Authentication
Note
This documentation is heavily based on ftw.tokenauth product’s documentation because we are using this product under-the-hood to provide authentication services for API users.
CLMS Website Authentication is handled using EU Login, European Commission’s user authentication service. This means that no user password is stored in the CLMS Website, but the portal uses Openid-connect to handle the user authorization with EU Login. By using EU Login the user only has to create one Europe-wide account and will be able to access all European services that use EU Login without needing to create a new account for each service.
That is why all users wanting to use the API need to create specific API tokens to communicate with the API.
Here we will explain all the steps needed to create and use such tokens.
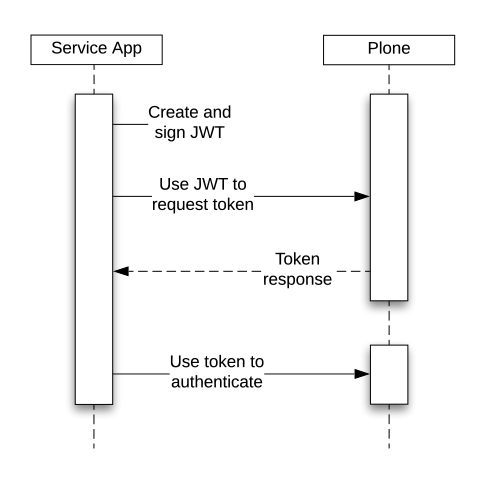
The use of API authentication flow involves four steps:
A logged-in service user issues a service key in Plone and stores the private key in a safe location accessible to the client application.
The client application uses the private key to create and sign a JWT authorization grant.
The client application exchanges the JWT authorization grant for a short-lived access token at the @@oauth2-token endpoint.
The client then uses this access token to authenticate requests to protected resources.
Assuming the client is in possession of a service key, the flow looks like this:
Login in the CLMS Website
Using the Register/Login button in the top green bar of the portal, the user will be redirected to EU Login where he will be able to login or register a new account.

When the user authorization is finished and the user is redirected back to the CLMS Website, the name of the user will be shown in the top green bar and the user will be able to access his profile page and create the needed API tokens.

Create API Tokens
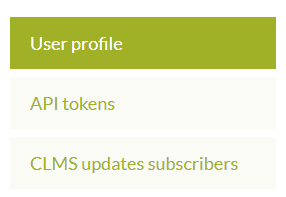
Clicking on the name in the top green bar, the user will be redirected to his profile page where he can fill the profile form and can also access some other options reserved for logged-in users.
Using the left menu present in the profile page the user can access the API Tokens section.
In this section the user will see all the available API Tokens, that can be revoked or where a new one can be created.
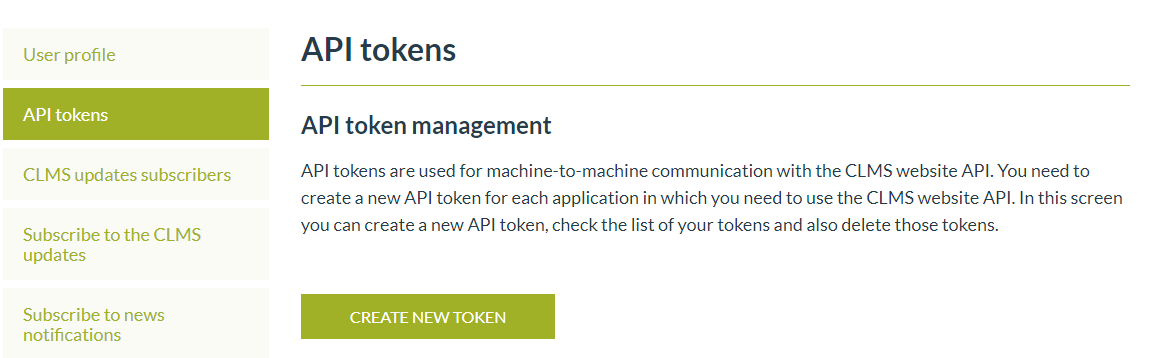
When clicking the Create new Token button a new form will be shown where the user can fill the name of the token:
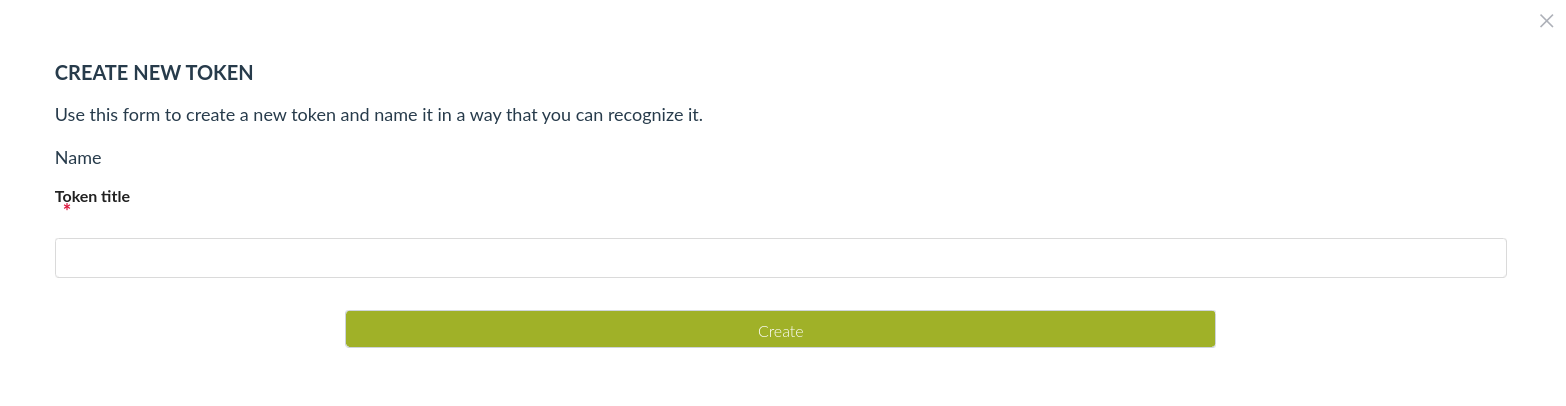
After filling the form the token will be created immediately and the token details will be presented in the form.
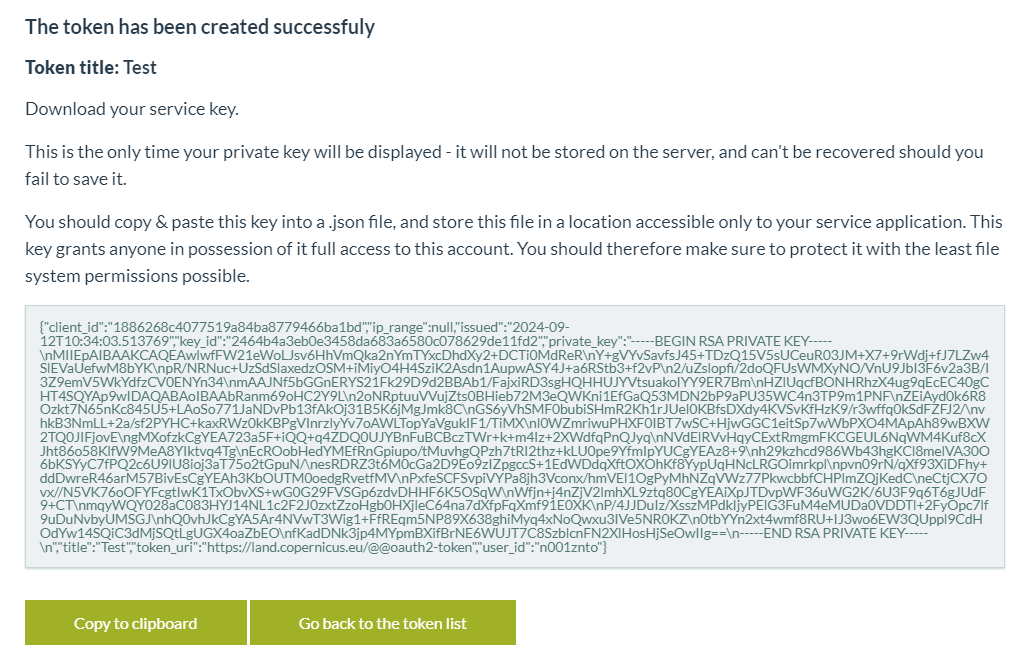
It is very important to note that token details will be shown just once and just in this moment. The user will need to follow the details and copy the token details to a file, in order to use the token in the future.
A service key looks like this (this specific token is revoked and no actions can be performed with it):
{
  "client_id": "36cf0c684995c843b580f3110eb29765",
  "ip_range": null,
  "issued": "2022-01-24T14:32:24.148197",
  "key_id": "edbb14448a3349ba51b83333c4ef51275ac11ced",
  "private_key": "-----BEGIN RSA PRIVATE KEY-----\nMIIEpAIBAAKCAQEA1enXnZ5/cTcc4DOn1wTzE9we22BYyE1vm0YnBSacAKIFIOXB\n0R4ZBosSGnUJBCokvsGYLli5GjFAPDH9DMaZNRtK4pInmXcffBIIz1smaTCIc2mp\nDaTheq44ex5lC7p/GbpQFF70Wss0r7ILLFl3gHqBHM29YnWpOoviQQ8fMarPycVt\ngc4Z6lvJGFuG7R3LJ1mVkTjAKr92iGlfOISn5SWLloGOrooI5uvUZl9AQ0EmUMjb\nuaiMDf9Eo50xrSGjcmGgFI1brW736vy7NdlUovlsDFK20kt1v6F/PUMqIGHrCNyD\nkv67yWLDx7BakiWg7K0gOyCRZ6kA5/yMRIZB3wIDAQABAoIBAQDA2qMeon/JRWPO\nKiP+caLo28IiDBne9BlTxwp01Vs+ItQ21Y1IiDcNtCHtImivjYM1S3p1Bl5TY+XC\nn1rBwubrfyCjZhs3e7Mx+1xf/ZCCs1PBoZfdCjKSlTGspjl5OnlOa6+4vebVWHC2\nmfEC2eIoPcnbew1sECIy+1xPRV/dOLi+0UbMTuxou1s1OP+a2SyC68dLRHv6ye6Z\n6uo73DlwkeYIS380gKfZSNlB5DqvykyVli6wKMaJtr9Mo28Zfh2uInSqcPwB7y1F\nHK3jxshBGODvWSPZTUuw3jqqKKwhVupJyO8KhJN9wVF5G2eOUeN4T90EFhnXxPQO\nRVK6Jk/ZAoGBAPY3VEQ8kbZq7Tqq8RbFoda/FpRbpKvZZoEhfWq3HSiWLrFJ1lLd\nuayuPfa/nuGqv0gcTzqe2GZVFNORTLvL9T/K8kNTJYch4O86Kuq8Vlyn4ky1ZqLT\n0N2SJNzJoMqKPc6yb1Mjo8NPan0d0ga2QQekz1tFRSc1J3NACKjo1cANAoGBAN5p\n6L4Ak37MxJm7vOL2wB/fd5lTyYo8iIw4mAMNLTC3vu1sYdtE60GhsowTXefM8TNS\nedyyHnnYPp49GwjZzoqWQ4ZGztAvzug91mg0jHzRoBsxLwW949zdKZqcsbbgz7KQ\nToBLSpEavuRoe81w8iyUfmMSK8mYnMFK7nI6bmKbAoGAeHj8J2NHnO1W5GTuEEll\nddEMOE1bFqcKS9baKhQtFUXe1OqfDu7kwgSD1y9Ni3fjnmITtkgw9GlfBmJLHHyg\npLUlsyGE9Ej0abmZdD/xNecDiKsd7EAeK7wtg0a5AUGBGpkedZyzrYY3Qb8MnDIj\nQZ03xJ3xR0zv36mOUy+SHyUCgYEAndymKVXXWoSUdlleM+nXa8f854Mk5U0ZzgzN\nOD09+foxNetbeXptUGQoimukl0ZLXJYJkK+MGgd2SnIsoheWFZ+ZxdC0Mef8/7IE\nYGoL3Pwcm7BJI9YnyTfgs7DMInVmdeMfFMhb4KoPG6ddV+/2s9Wh70eSdMAxYrCA\nlesLNkkCgYBPrmA4wmpGaWE4OGttItX3/O4ZwLPm+f0mmdA9mBYAf0FnazScl9mk\nVXHnpD9W8lHiUMwLUEjX3fcpL4lgH9axCHt7YjlAnn950n2xWzgsrTH8A2VcUfmI\n4KDF3GRiT0QRIQ5y6jvY4NwcnCKwrPTV2wltIaXo1lYiCTcnipdm5Q==\n-----END RSA PRIVATE KEY-----\n",
  "title": "Token Name 1",
  "token_uri": "https://land.copernicus.eu/@@oauth2-token",
  "user_id": "n00015mf"
}
After creating one or more tokens the user will be able to delete them using the buttons in the token list view.
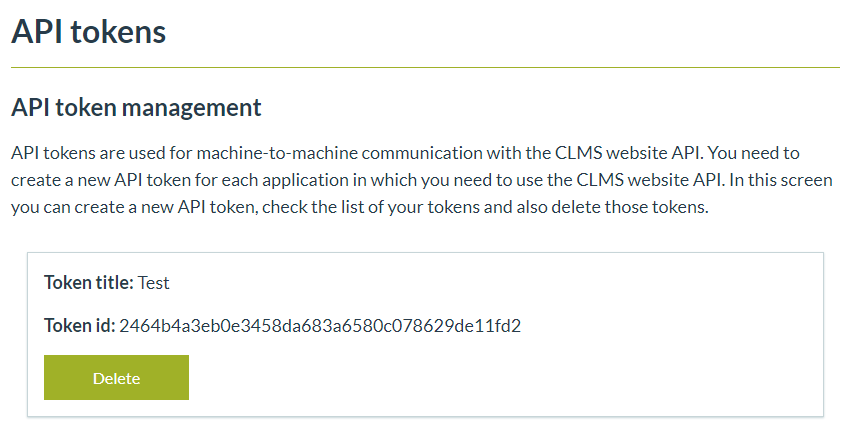
After deleting the token you can create a new one.
Use the access token to authenticate requests.
The client can then use the access token to authenticate requests. The token needs to be sent in the HTTP Authorization header as a Bearer token, as follows:
http
GET /api/@search?portal_type=DataSet HTTP/1.1
Host: land.copernicus.eu/
Accept: application/json
Authorization: Bearer <REDACTED>
curl
curl -i -X GET 'https://land.copernicus.eu//api/@search?portal_type=DataSet' -H "Accept: application/json" -H "Authorization: Bearer <REDACTED>"
wget
wget -S -O- 'https://land.copernicus.eu//api/@search?portal_type=DataSet' --header="Accept: application/json" --header="Authorization: Bearer <REDACTED>"
python-requests
requests.get('https://land.copernicus.eu//api/@search?portal_type=DataSet', headers={'Accept': 'application/json', 'Authorization': 'Bearer <REDACTED>'})
Token expiration and renewal
Once the token expires the client must create a JWT authorization grant again and request a new access token.
The client should, instead of trying to predict access token expiration, just anticipate the case that authentication using an existing token will fail (because the token expired) and then perform the necessary steps to obtain a new token.
To accomplish this it is recommended to delegate all the requests a client application wants to make to a class that expects an Access token expired response as described above and obtains a new token if necessary. The failed request that leads to the error response then needs to be re-dispatched with its original parameters but with the new token in the Authorization header.
Care needs to be taken to not include an expired token (or any Authorization header for that matter) with the requests to the token endpoint when obtaining a new token.